
When using ropes to support yourself or a rescue load, you have to attach them to something that will not release when the expected load (plus the safety factor) is applied. This attachment point is called the anchor. The anchor consists of both the object to which the rope is tied and the method of tying the rope to the object. The usual choices for objects used for anchors are trees, boulders, vehicles. Snow anchors are also used but are not discussed in this section. Considerations for choosing an object for an anchor are discussed at the end of this section.
There are two basic types of anchors. One is for attaching the end of a fixed-line (e.g., a rappel line). The other forms some sort of loop for attaching brakes, uphaul systems, or additional fixed lines.
Fixed lines
Essentially, this is simply tying the end of the line to something that will not move given the loads to be placed on it.
Fixed lines – Tensionless anchor:
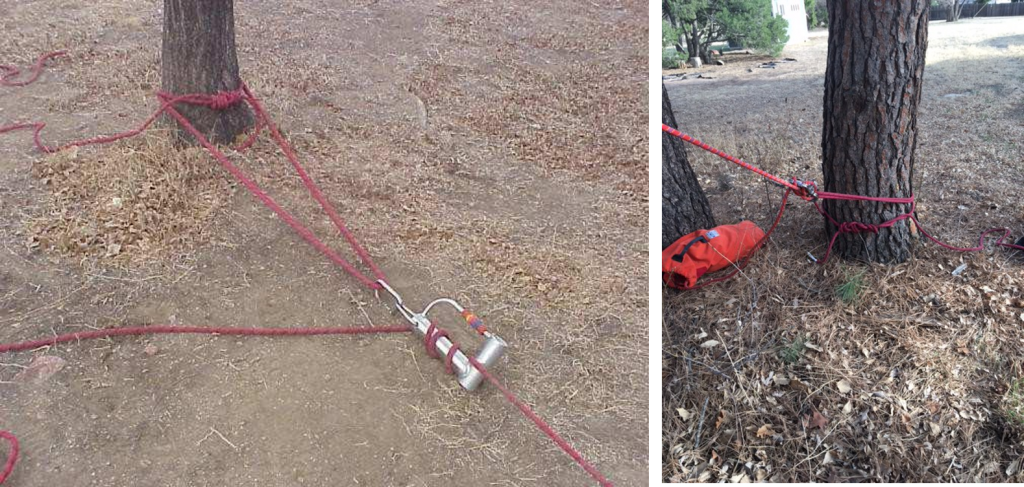
The tensionless anchor is one of the most common anchors used for setting up fixed lines. It is very strong (no loaded knot or carabiner to weaken the line) and it is very easy to set up. The tensionless anchor is tied by wrapping the rope at least 2, but usually 3 or more times around a tree to provide sufficient friction to hold the load. A figure 8 on a bight is then tied in the loose end of the load line with a carabiner attaching the free end to the load line. The carabiner should hang loosely on the load line; it is the friction of the rope against the tree that keeps the rope in place. If the rope should slip around the tree and the carabiner is pulled tight against the rope, the bend in the rope at the carabiner weakens the rope at that point. In practice, the rope will have knots in it or will pass over rock edges or carabiners that will weaken the rope more than the bend at the carabiner in a tensionless anchor. However, you should strive to eliminate any weak points in your systems that you can.
It is also acceptable to tie a Retrace Figure 8 around the load line instead of using a carabiner. This will generally take a bit more time to tie, but it frees up a carabiner that may be needed elsewhere.
Tensionless Anchor

Fixed lines – Other knots used for fixed line anchors:
It is acceptable to tie a fixed line to an object using a Bowline, Modified High-Strength Bowline or Retrace Figure 8.
Anchors for Rescue Systems
Usually, this consists of tying a rope around an object (tree or rock) so that a continuous loop is formed into which carabiners can be clipped. It is very important to consider all directions that the load MIGHT pull during the operation. The load direction can change rather significantly during an operation, and the anchor must remain sound. If using a boulder, be sure that the rope cannot slip up over the top of the boulder in any direction the load could shift.
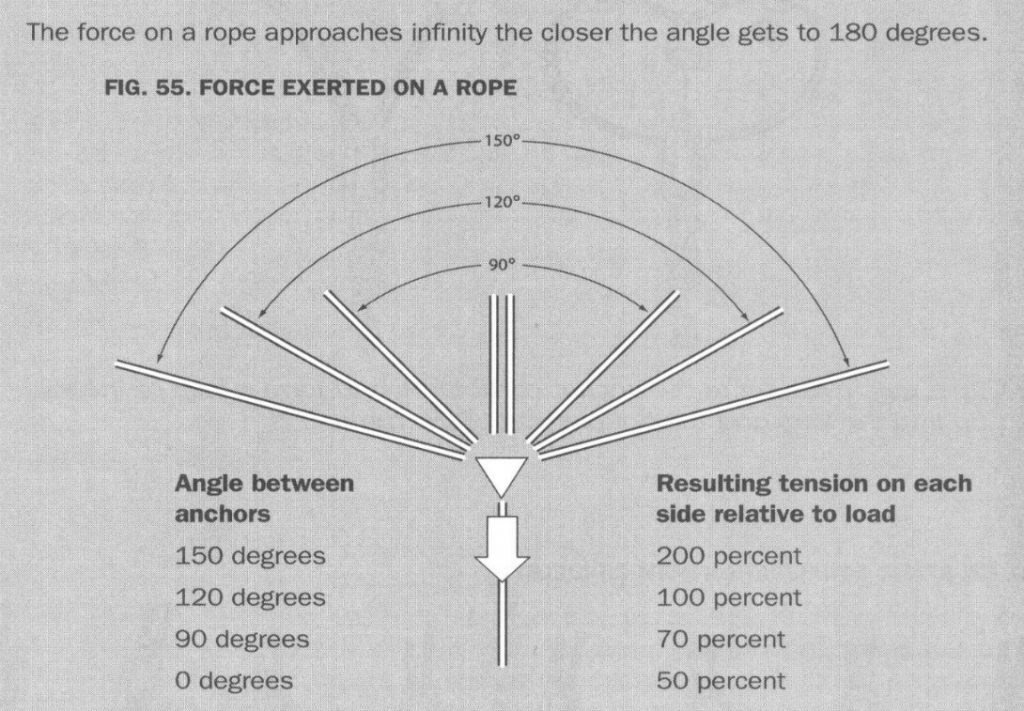
It is important to pay attention to the angle formed by the “legs” of the loop. The tension in the loop increases as the angle between the outer legs increases. In the illustration below, the anchor on the left will have much less tension in the loop than the anchor on the right. As a good rule of thumb, keep the angle between the outer legs less than 120 degrees and preferably less than 90 degrees. The tension in the anchor rope with an angle of 120 degrees is nearly twice that in an anchor with an angle of 30 degrees.

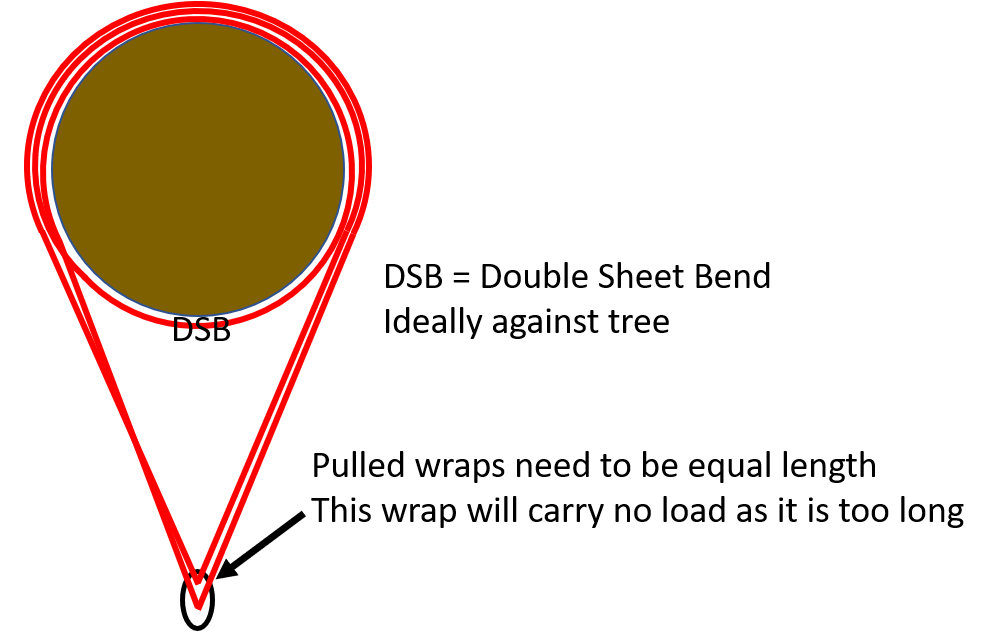
A single wrap (loop) of rope around an object may be sufficient, but usually, the rope is wrapped two or more times around the object to increase the strength of the anchor. It is important to adjust the wraps so that each wrap will be under tension and share part of the load. The illustration below is a Wrap 3/Pull 2 anchor (discussed in the next section). The illustration shows one wrap shorter than the other. The shorter wrap carries all the load and the longer one carries none. Both wraps should be the same length so they share the load and maximize the strength of the anchor. This holds true for ANY anchor with multiple wraps, whether a Wrap 3/Pull 2 or simply multiple wraps around an object with all “pulled”.
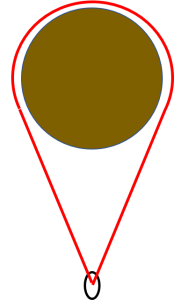
Anchors for Rescue Systems – Wrap 3/Pull 2:
The Wrap 3/Pull 2 anchor is created by wrapping a rope three times around a tree, tying the ends together with a double sheet bend, and pulling two wraps out leaving one of the wraps tight against the tree. The two “pulled” wraps should be adjusted so they are the same length so each will share the load (as discussed in the previous section). The tight wrap against the tree will help keep the anchor from sliding up or down the tree. The knot should be kept out of the part of the loops to which you will be connecting carabiners. It is best to put it against the object, either in the tight wrap or on the backside of the object. Make sure the knot can be checked and that it cannot become jammed. The anchor should be as close to the bottom of the tree as possible; putting the anchor high on the tree dramatically increases the load on the tree. Trees used for anchors should be of substantial size, alive, and with a good root system.
Wrap 3/Pull 2 Anchor with brake tube attached. Three loops around tree, one against tree, knot in loop against tree. Tight wrap against the tree helps keep the rope in place should the load direction try to pull the rope up (or down) the tree.
The Wrap 3/Pull 2 anchor is very strong and a good choice in most rescue situations when a tree is used for the main anchor. As discussed above, make sure the angle between the “legs” on the pulled wraps is less than 120 degrees and preferably less than 90 degrees. The smaller the angle is, the smaller the tension in the anchor rope.
A Wrap 3/Pull 2 anchor can be used around a boulder, but the tight wrap against the boulder can be problematic. If the boulder is large, it can be very time-consuming and difficult to adjust the ropes so each of the two “pulled” wraps will share some load. Unless the third wrap substantially helps keep the rope in place on the boulder, it is usually best to just wrap a rope around a boulder twice, tie the ends together and adjust the two wraps so each shares the load. Be sure to pad any sharp corners on the boulder to protect the rope.
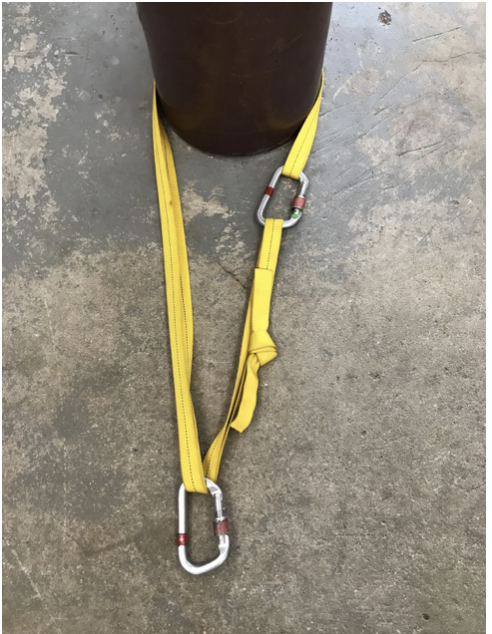
Anchors for Rescue Systems -Basket Anchor
The common Wrap 3/Pull 2 anchor is very strong and robust. However, it does take some time to tie and an anchor rope is generally required. Many technical rescues take place on relatively low-angle terrain, and the strength of the Wrap 3/Pull 2 anchor is greater than necessary. Particularly when setting many anchors with a critical patient, the Basket Anchor may be preferable.
To set up a Basket Anchor, take a loop of webbing (tied with a Water Knot which is FIRMLY set), run the loop around the object and join the ends with a carabiner. Be sure that your webbing loop is long enough that the angle formed by the legs of the anchor does not exceed 120º. If the webbing loop is long and the angle is small, the strength of the basket anchor is approximately 8,000 lb for a working load of 2,000 lb. If the webbing loop is shorter and the angle is 120º, the strength and working load are cut in half: strength = 4,000 lb, working load = 1,000 lb. Ensure that the carabiner is in one of the standing legs of the anchor. To use the anchor utilize an additional carabiner clipped to the loop.
A basket anchor can be tied with rope as well. This is often a good choice when tying an anchor around a large boulder.
Anchors for Rescue Systems -Backup anchors:
Backup anchors are sometimes used if there is particular concern over the consequences if a main anchor should fail. In general, it is better to set up a load-distributing anchor (LDA, see Appendix E) rather than use a backup anchor, since it lessens the load on the main anchor. You NEVER want to have a main anchor fail. Even if backed up, the shock loading on the system will be great. NEVER compromise on a backup anchor thinking: “It’s only the backup”. This is a dangerous trap many people fall into.
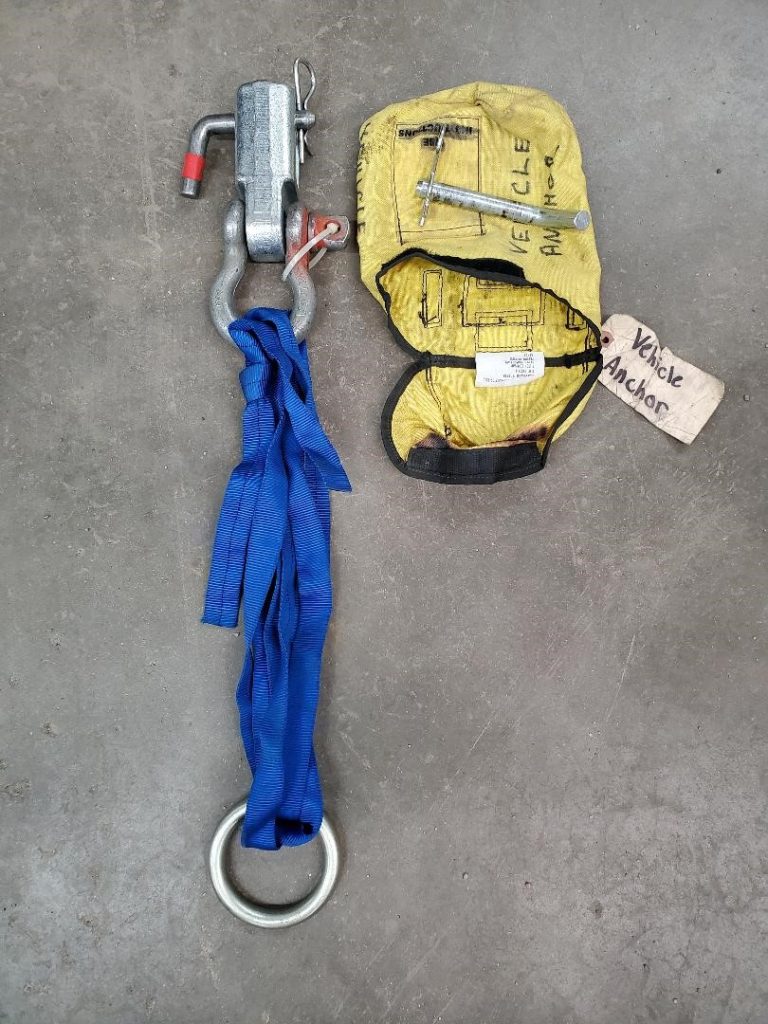
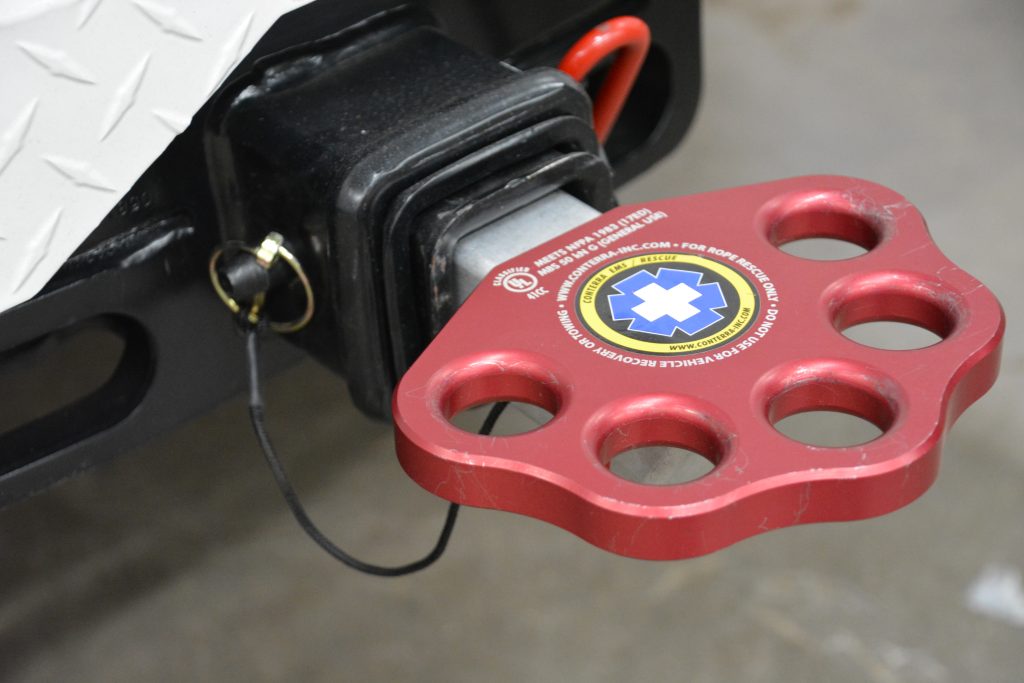
Anchors for Rescue Systems -Vehicle Anchor:
There is a vehicle anchor in each team vehicle. The vehicle anchor is in a yellow bag and is stored with the rescue equipment (NOT the vehicle equipment) and is only to be used for rescue. They fit in the receiver hitch of any of the vehicles. The anchor consists of several loops of webbing, pre-tied through a solid ring and pre-loaded. There should be no reason to disassemble any portion of the anchor prior to use.
Vehicles can be used as a single vehicle anchor or an uphaul system can be rigged between two vehicles.
The driver must ensure that the vehicle is on solid ground, wheels chocked, parking brake engaged and the wheels turned to a 45-degree angle.
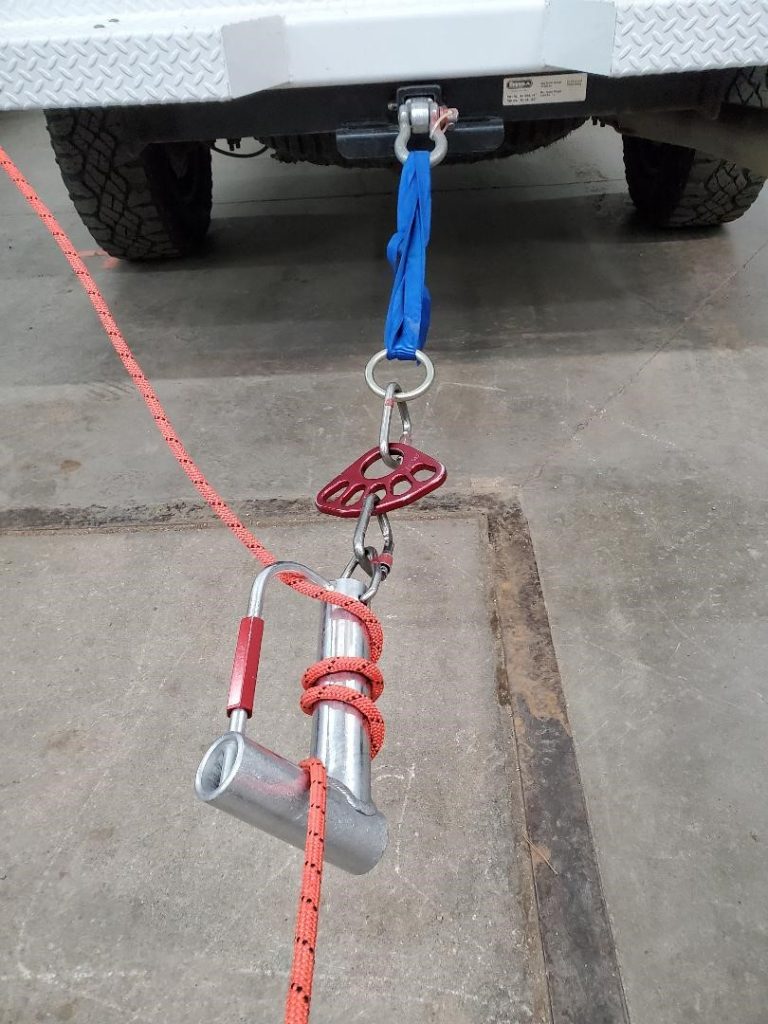
Again, these anchors are for RESCUE, and not for towing vehicles, moving downed trees, etc. If a vehicle anchor is used for any purpose other than rescue, immediately take it out of service and inform the equipment committee.
Anchor Selection
Generally speaking, EPCSAR uses trees, boulders, snow, and vehicles as the objects used to establish anchors. Below is some basic information on choosing the objects for anchors.
Trees
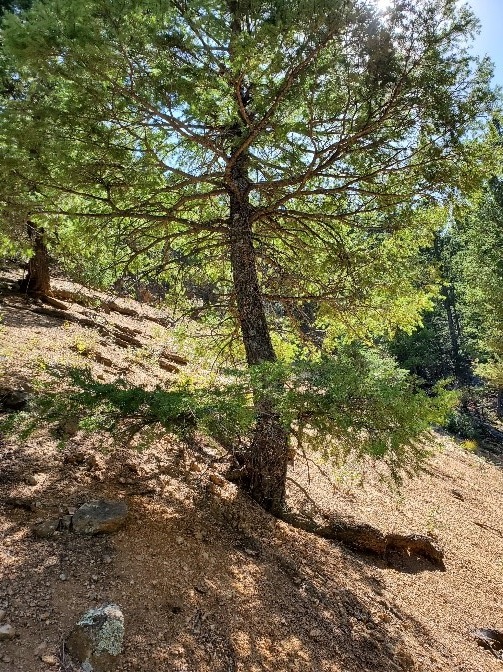
Trees are the anchor object of choice when available. Always look for the BFT (Big Fat Tree aka bomber trees) as your best anchor. There are specific things to look for in finding a good tree anchor:
- Choose a healthy, solid tree. Avoid trees with damage: splits, many beetle holes, missing bark, fire damage. A good anchor tree will have solid roots well anchored in the ground, will not be leaning and will be away from a cliff face.
- Size does matter. First, determine what load the anchor must support – a single rappeler or a rescue system. A steeper slope requires a more substantial anchor. While many factors affect the strength of a tree, a tree trunk 8 inches in diameter is generally suitable for a single person load and a tree trunk 10-12 inches in diameter is generally suitable for a rescue system anchor.
- Location. Consider where the ropes need to go and what direction the load will pull. There must be sufficient space downhill of the anchor for the litter team to organize and go on belay. If the litter will be hauled up to the anchor, is there a sufficient “landing space” for the litter and litter bearers, including the length of the anchor and rescue system? Choose anchors that are well back of a cliff face to provide room to work.
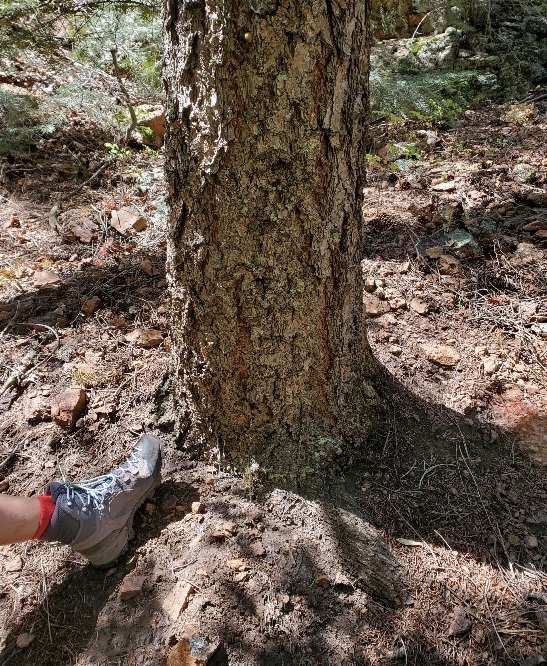
When placing the anchor, tie anchor ropes as low as possible on the tree. The forces on the roots increase significantly the higher the anchor is placed on a tree. An tree that can support a rescue load with the anchor around the roots may be uprooted if the same anchor and load is placed higher on the trunk. Clear out any branches, rocks, etc that might get into the system or hinder the brake person or backup brake person. The area from the tree to the bear claw needs to be clear of debris, branches, etc. Organize any excess rope in a pile next to the tree to keep it out of the way.
Rocks/Boulders
If a rock is to be used as an anchor, look for something large and preferably buried so that it cannot move. Look for fractures that could cause the anchor to fail. Large detached boulders can be suitable, but it is important to consider the entire environment around the boulder. Is it sitting on loose, muddy or icy ground that could allow it to slide, and what happens if it does slide? Can the boulder tip over when loaded? A gentle scree slope with a 5×5 ft rock buried in flat ground supporting a gentle to moderate scree evacuation might be sufficient, but the same rock might not be suitable for a rescue in steeper terrain.
Boulders that are large enough to use as anchors probably will require a 200′ rope instead of an anchor rope. Remember that the angle formed by the rope at the system attachment point should preferably be less than 90 degrees, which will require more rope. As with trees, plan for a suitable landing place for the litter and litter bearers.
Be certain that the rope cannot slip over the top of the boulder when under load in any direction the load could conceivably pull. Rocks have sharp edges and cracks where the rope can get jammed, potentially causing rope damage. Pad these areas to prevent such damage. Keeping the rope low on the rock will help keep it from slipping over the boulder and reduce the possibility of tipping over the boulder.

