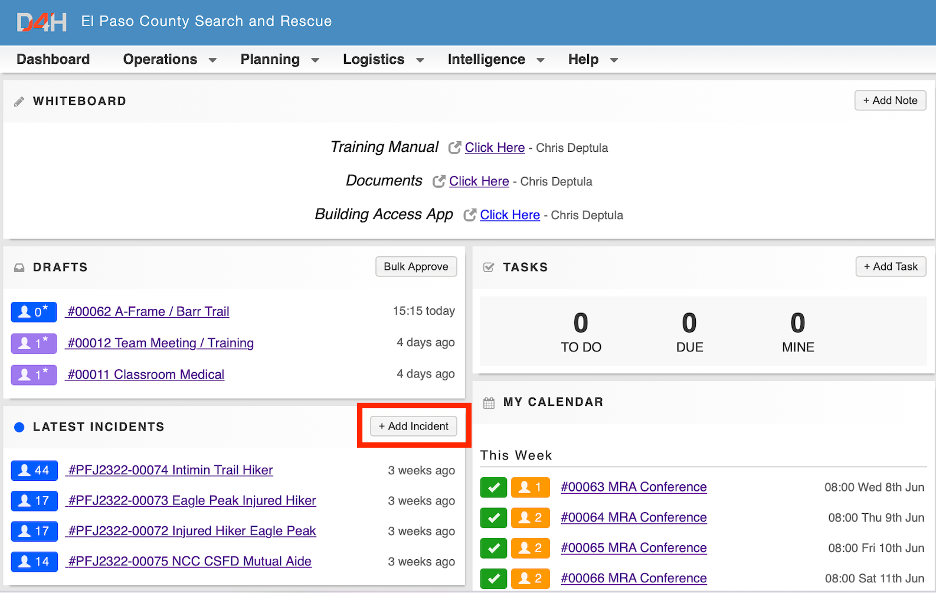
- Click the Add Incident button on the D4H Dashboard:
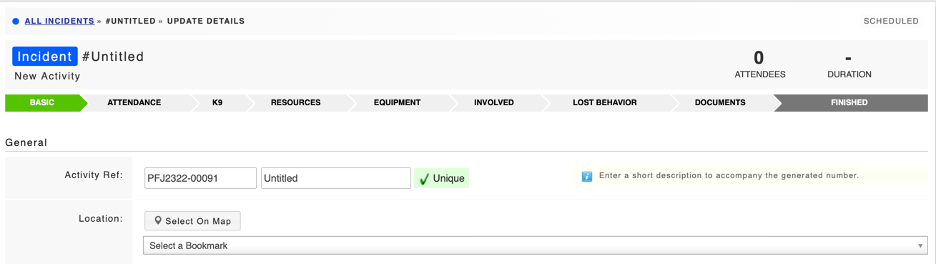
- Click the 5 digit number next to activity ref and change it to the EPCSAR case number.
- Provide a descriptive name for the incident. I recommend location situation activity. For example Lower Barr Trail Injured Hiker.
- Continue to fill out the form on the “Basic” tab
- Location: This should be the initial location from the call screen.
- Attendance Type: For limited response select Selective-Team Incident. For all other missions select Full-Team Incident.
- Description: This should contain all descriptive text about the mission. There is no limit for this field. Note: The old mission report had 3 different text fields, D4H only has one. Put everything in this field.
- Private Data: This will generally be left empty, but if you have any data that should only be visible to team leadership you can put it here.
- Weather Section
- Click the Auto-Complete Weather button
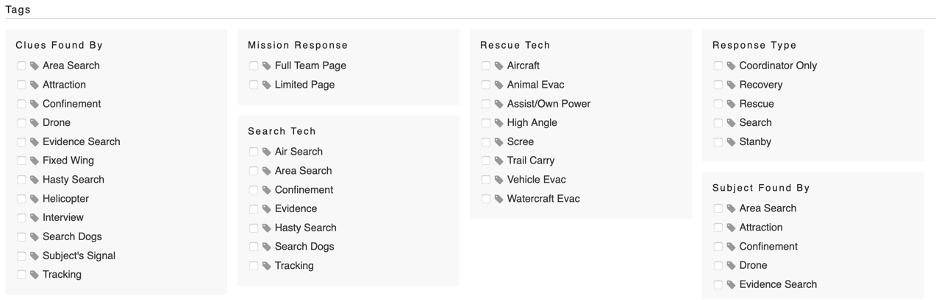
- Tags: Make sure to select the appropriate tags. The mission report will be rejected if at tags are not selected.
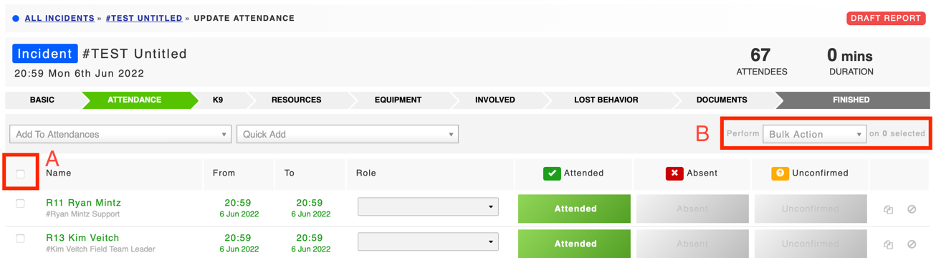
- Attendance Tab
- For full team responses D4H defaults everyone to attended. I recommend rather than marking absent everyone who did not attend that you use the following workflow.
- A Click the check box next to the Name field heading
- B Select the Bulk Actions drop down
- Select Set Status from the drop down
- Choose “Absent” and then “Update Selected”
- Go through the list of members who attended and change their status to “Attended”.
- For IC/ODC select the IC/ODC role from the “Role” drop down for the appropriate member. If you know it I also recommend setting the rescue group and safety along with any other available roles.
- For limited response
- In the “Add to attendees” drop down select the appropriate attendees
- Follow the full team attendance workflow from above.
- K9 tab
- If a K9 handler responded, their K9s will be listed on the K9 tab. Select attended for any K9s who were used during the mission.
- Resources tab
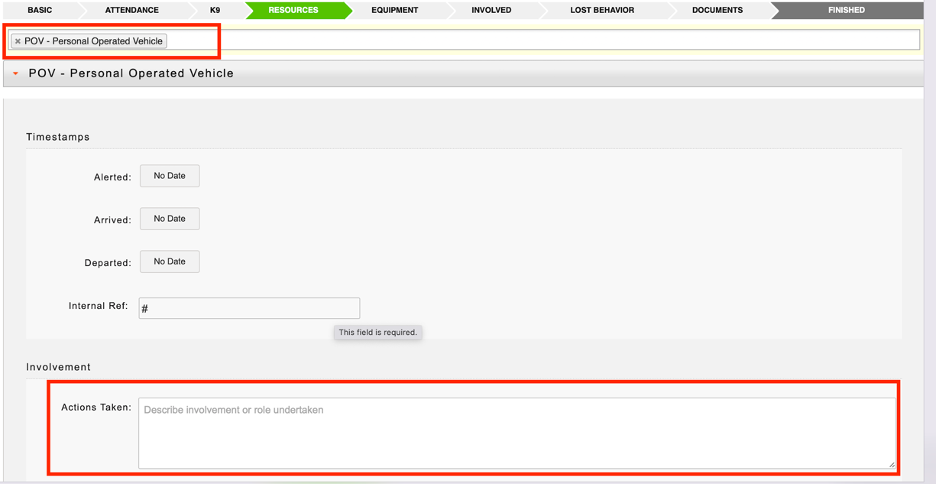
- If the IC requested a POV to complete the mission, for example requesting a POV in the page for a taxi mission, or using POV’s to drive up LRR, select POV from the drop down. Under Actions Taken list the number of POVs used.
- For any other agencies that responded, select them in the resources drop down. If known, list the number of personnel in the actions taken text box.
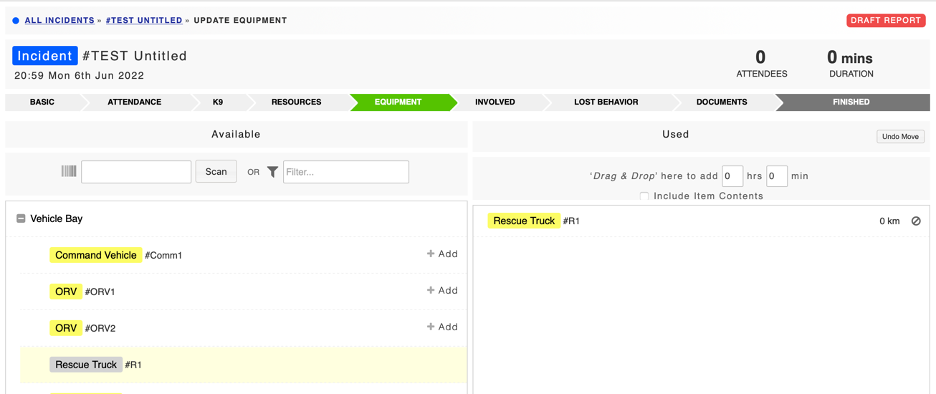
- Equipment tab
- Drag the vehicles that were used from the left box to the right
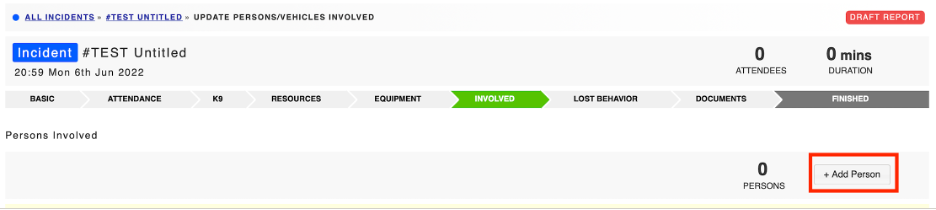
- Involved tab
- This is for subject, RP, other people involved not mentioned elsewhere.
- Click “Add Person” for each person you want to add
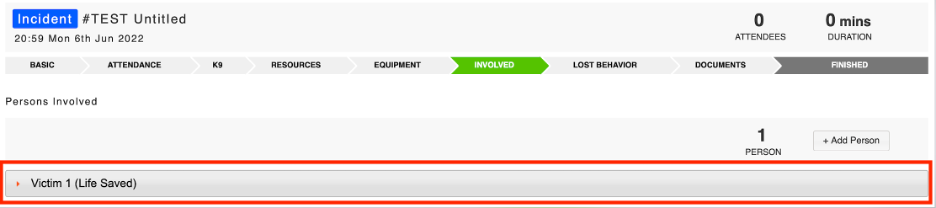
- Click on the added person to expand it:
- Fill out the form to the best of your ability.
- Pay special attention to the Role tab. This is where you select if the person was the RP, victim, witness, etc.
- Lost Behavior tab
- This tab is poorly named. It should be filled out regardless of if the person was lost or not.
- Fill as much of this tab out as you can.
- Documents tab
- This is where you can attach any documents you wish. For example, call screen log, IAP, etc.
- Click the Finished tab
- Your report will be reviewed as soon as possible and if changes are needed will be requested via both a discusson on the incident report and an email.